grpc官方文档实验与翻译(python
发布时间:2019-08-26 07:19:48编辑:auto阅读(2199)
tensorflow分布式与tensorflow serving底层通信都是是用的grpc,所以就看了一下grpc的基本用法(python版)
首先是环境的安装,先要更新pip到version8或者以上
$ python -m pip install --upgrade pip$conda create --name py35tf python=3.5
$source activate py35tf接下来还是工具的安装
$ python -m pip install grpcio
$ python -m pip install grpcio-tools
$ pip install protobuf接下来我们首先试着使用一下官方给予的example,然后再按照自己的需求更新proto文件 服务端和客户端的python文件
从github上clone官方教程
$ # Clone the repository to get the example code:
$ git clone https://github.com/grpc/grpc
$ # Navigate to the "hello, world" Python example:
$ cd grpc/examples/python/helloworld$ python greeter_server.py &
$ python greeter_client.py这时候窗口会输出Greeter client received:Hello,you!
然后使用jobs查看一下服务端的进程ID,再使用kill ID直接带走服务端进程,准备写一个自己定义的服务了
首先需要修改proro文件来定义服务,主要是添加了SayHelloAgain
syntax = "proto3";
// The greeting service definition.
service Greeter {
  // Sends a greeting
  rpc SayHello (HelloRequest) returns (HelloReply) {}
  // Sends another greeting
  rpc SayHelloAgain (HelloRequest) returns (HelloReply) {}
}

// The request message containing the user's name.
message HelloRequest {
  string name = 1;
}

// The response message containing the greetings
message HelloReply {
  string message = 1;
}$ python -m grpc_tools.protoc -I. --python_out=. --grpc_python_out=. ./helloworld.protodef SayHelloAgain(self, request, context):
return helloworld_pb2.HelloReply(message='Hello again, %s!' % request.name) response = stub.SayHelloAgain(helloworld_pb2.HelloRequest(name='you'))
print("Greeter client received: " + response.message)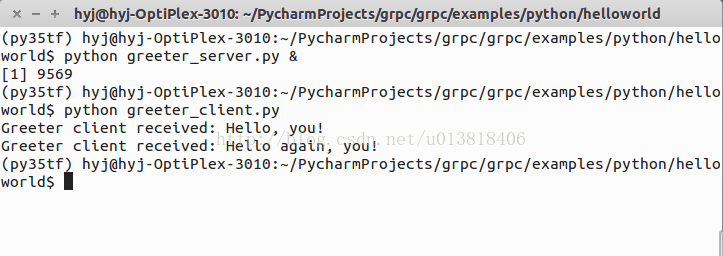
(既要实习又要发论文的日子好难熬~.~)
上一篇: python-检测cpu负载
下一篇: Python中的long类型
- openvpn linux客户端使用
52315
- H3C基本命令大全
52224
- openvpn windows客户端使用
42363
- H3C IRF原理及 配置
39253
- Python exit()函数
33728
- openvpn mac客户端使用
30688
- python全系列官方中文文档
29413
- python 获取网卡实时流量
24352
- 1.常用turtle功能函数
24228
- python 获取Linux和Windows硬件信息
22599
- LangChain-MCP工具后端部署与前端交互
39°
- LangChain接入自定义爬虫-MCP工具
66°
- LangChain接入Filesystem-MCP工具
65°
- LangChain搭建MCP服务端和客户端流程
110°
- LangGraph与MCP技术概述
97°
- LangChain 1.0-Agent中间件-实现闭环(批准-编辑-拒绝动作)
208°
- LangChain 1.0-Agent中间件-汇总消息
200°
- LangChain 1.0-Agent中间件-删除消息
211°
- LangChain 1.0-Agent中间件-消息压缩
216°
- LangChain 1.0-Agent中间件-多模型动态选择
264°
- 姓名:Run
- 职业:谜
- 邮箱:383697894@qq.com
- 定位:上海 · 松江
