AI多模态- Janus-Pro-7B模型本地部署1
发布时间:2025-04-23 20:00:47编辑:123阅读(2742)
DeepSeek 多模态模型 Janus-Pro 本地部署
Janus-Pro是DeepSeek最新开源的多模态模型,是一种新颖的自回归框架,统一了多模态理解和生成。通过将视觉编码解耦为独立的路径,同时仍然使用单一的、统一的变压器架构进行处理,该框架解决了先前方法的局限性。这种解耦不仅缓解了视觉编码器在理解和生成中的角色冲突,还增强了框架的灵活性。Janus-Pro 超过了以前的统一模型,并且匹配或超过了特定任务模型的性能。
代码链接:https://github.com/deepseek-ai/Janus
模型链接:https://modelscope.cn/collections/Janus-Pro-0f5e48f6b96047
体验页面:https://modelscope.cn/studios/AI-ModelScope/Janus-Pro-7B
安装虚拟环境
conda create --name vll python=3.9
激活虚拟环境,执行命令:
conda activate vll
查看CUDA版本,执行命令:
nvcc -V

创建项目目录
mkdir vllm
cd vllm
克隆代码
git clone https://github.com/deepseek-ai/Janus
安装依赖包
cd Janus/
pip install -e .

下载模型
可以用modelscope下载,安装modelscope,命令如下:
pip install modelscope
modelscope download --model deepseek-ai/Janus-Pro-7B

把下载的模型移动到vllm目录里面
mv /home/sam_admin/.cache/modelscope/hub/models/deepseek-ai /home/sam_admin/vllm
测试图像理解
创建image_understanding.py文件,代码如下:
import torch
from transformers import AutoModelForCausalLM
from janus.models import MultiModalityCausalLM, VLChatProcessor
from janus.utils.io import load_pil_images

model_path = "deepseek-ai/Janus-Pro-1B"

image='aa.jpeg'
question='请说明一下这张图片'
vl_chat_processor: VLChatProcessor = VLChatProcessor.from_pretrained(model_path)
tokenizer = vl_chat_processor.tokenizer

vl_gpt: MultiModalityCausalLM = AutoModelForCausalLM.from_pretrained(
    model_path, trust_remote_code=True
)
vl_gpt = vl_gpt.to(torch.bfloat16).cuda().eval()

conversation = [
    {
        "role": "<|User|>",
        "content": f"<image_placeholder>\n{question}",
        "images": [image],
    },
    {"role": "<|Assistant|>", "content": ""},
]

# load images and prepare for inputs
pil_images = load_pil_images(conversation)
prepare_inputs = vl_chat_processor(
    conversations=conversation, images=pil_images, force_batchify=True
).to(vl_gpt.device)

# # run image encoder to get the image embeddings
inputs_embeds = vl_gpt.prepare_inputs_embeds(**prepare_inputs)

# # run the model to get the response
outputs = vl_gpt.language_model.generate(
    inputs_embeds=inputs_embeds,
    attention_mask=prepare_inputs.attention_mask,
    pad_token_id=tokenizer.eos_token_id,
    bos_token_id=tokenizer.bos_token_id,
    eos_token_id=tokenizer.eos_token_id,
    max_new_tokens=512,
    do_sample=False,
    use_cache=True,
)

answer = tokenizer.decode(outputs[0].cpu().tolist(), skip_special_tokens=True)
print(f"{prepare_inputs['sft_format'][0]}", answer)
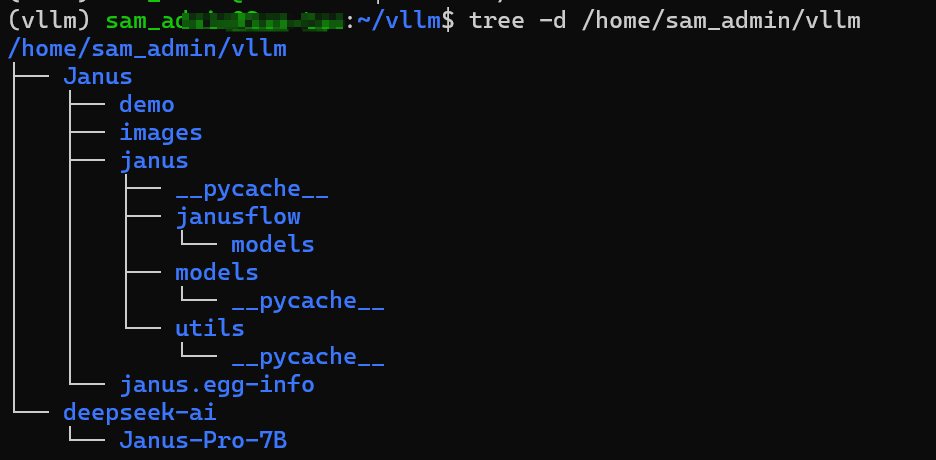
上传一张aa.jpg图片到当前目录下,目录结构如下:
运行代码结果如下:

aa.jpeg

测试图片生成
新建image_generation.py脚本,代码如下:
import os
import PIL.Image
import torch
import numpy as np
from transformers import AutoModelForCausalLM
from janus.models import MultiModalityCausalLM, VLChatProcessor

# specify the path to the model
model_path = "deepseek-ai/Janus-Pro-1B"
vl_chat_processor: VLChatProcessor = VLChatProcessor.from_pretrained(model_path)
tokenizer = vl_chat_processor.tokenizer

vl_gpt: MultiModalityCausalLM = AutoModelForCausalLM.from_pretrained(
    model_path, trust_remote_code=True
)
vl_gpt = vl_gpt.to(torch.bfloat16).cuda().eval()

conversation = [
    {
"role": "<|User|>",
"content": "A stunning princess from kabul in red, white traditional clothing, blue eyes,brown hair",
    },
    {"role": "<|Assistant|>", "content": ""},
]


sft_format = vl_chat_processor.apply_sft_template_for_multi_turn_prompts(
    conversations=conversation,
    sft_format=vl_chat_processor.sft_format,
    system_prompt="",
)
prompt = sft_format + vl_chat_processor.image_start_tag


@torch.inference_mode()
def generate(
        mmgpt: MultiModalityCausalLM,
        vl_chat_processor: VLChatProcessor,
        prompt: str,
        temperature: float = 1,
        parallel_size: int = 16,
        cfg_weight: float = 5,
        image_token_num_per_image: int = 576,
        img_size: int = 384,
        patch_size: int = 16,
):
    input_ids = vl_chat_processor.tokenizer.encode(prompt)
    input_ids = torch.LongTensor(input_ids)

    tokens = torch.zeros((parallel_size * 2, len(input_ids)), dtype=torch.int).cuda()
    for i in range(parallel_size * 2):
        tokens[i, :] = input_ids
        if i % 2 != 0:
            tokens[i, 1:-1] = vl_chat_processor.pad_id

    inputs_embeds = mmgpt.language_model.get_input_embeddings()(tokens)

    generated_tokens = torch.zeros((parallel_size,image_token_num_per_image), dtype=torch.int).cuda()

    for i in range(image_token_num_per_image):
        outputs = mmgpt.language_model.model(inputs_embeds=inputs_embeds, use_cache=True,
                  past_key_values=outputs.past_key_values if i != 0 else None)
        hidden_states = outputs.last_hidden_state

        logits = mmgpt.gen_head(hidden_states[:, -1, :])
        logit_cond = logits[0::2, :]
        logit_uncond = logits[1::2, :]

        logits = logit_uncond + cfg_weight * (logit_cond - logit_uncond)
        probs = torch.softmax(logits / temperature, dim=-1)

        next_token = torch.multinomial(probs, num_samples=1)
        generated_tokens[:, i] = next_token.squeeze(dim=-1)
        next_token=torch.cat([next_token.unsqueeze(dim=1),
        next_token.unsqueeze(dim=1)],dim=1).view(-1)
        img_embeds=mmgpt.prepare_gen_img_embeds(next_token)
        inputs_embeds = img_embeds.unsqueeze(dim=1)

    dec = mmgpt.gen_vision_model.decode_code(generated_tokens.to(dtype=torch.int),
                shape=[parallel_size, 8, img_size// patch_size,img_size // patch_size])
    dec = dec.to(torch.float32).cpu().numpy().transpose(0, 2, 3, 1)

    dec = np.clip((dec + 1) / 2 * 255, 0, 255)

    visual_img = np.zeros((parallel_size, img_size, img_size, 3), dtype=np.uint8)
    visual_img[:, :, :] = dec

    os.makedirs('generated_samples', exist_ok=True)
    for i in range(parallel_size):
        save_path = os.path.join('generated_samples', "img_{}.jpg".format(i))
        PIL.Image.fromarray(visual_img[i]).save(save_path)


generate(
    vl_gpt,
    vl_chat_processor,
    prompt,
)
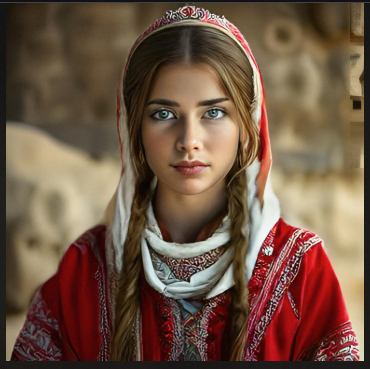
要求:生成一张来自喀布尔的惊艳公主,身穿红白相间的传统服装,蓝眼睛,棕色头发的图片。
返回图片
安装Gradio,执行命令:
pip install -e .[gradio]

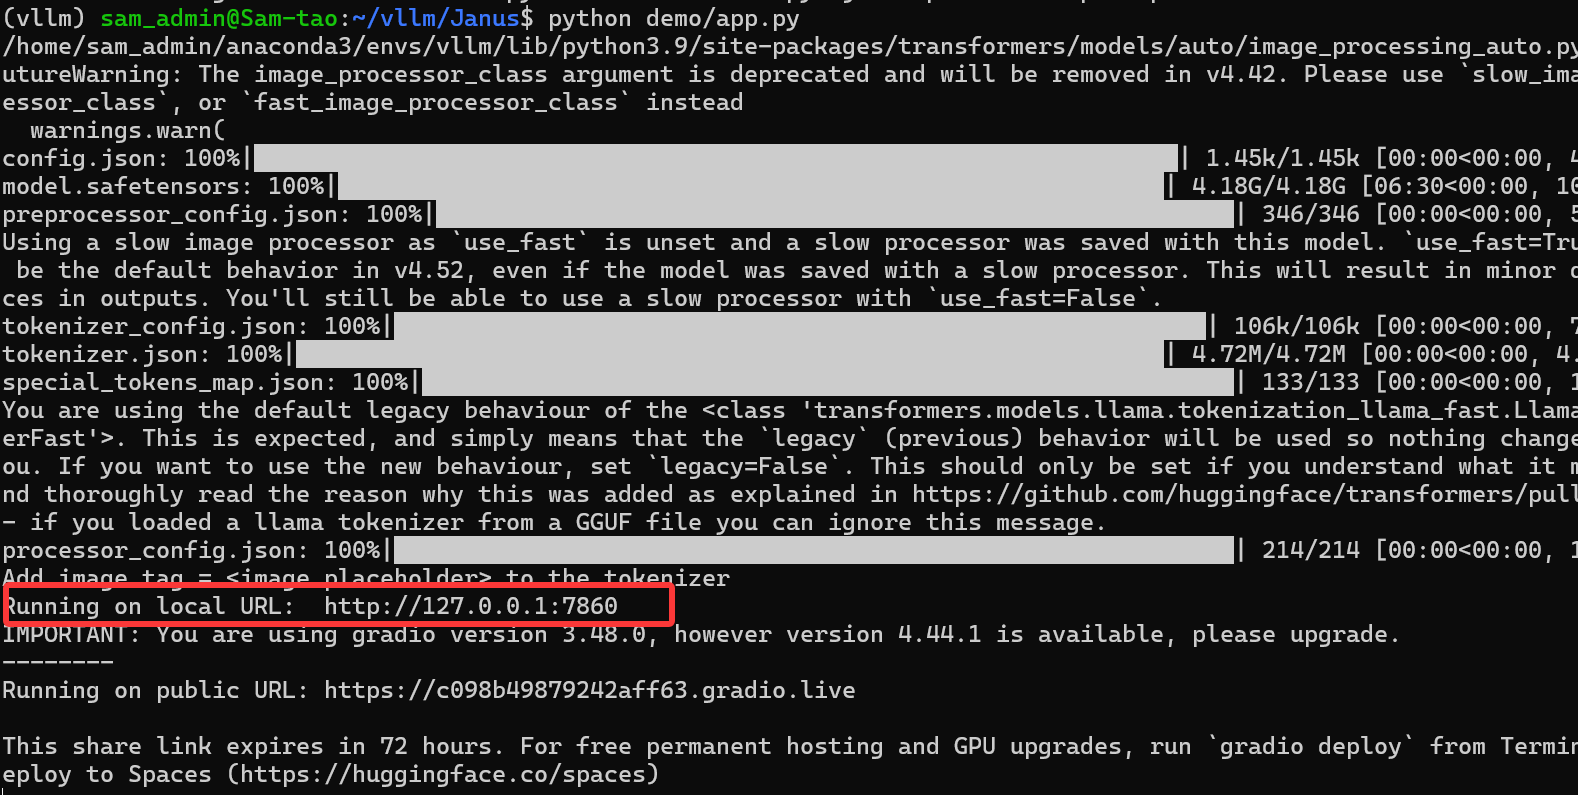
运行代码
python demo/app.py
访问http://127.0.0.1:7860
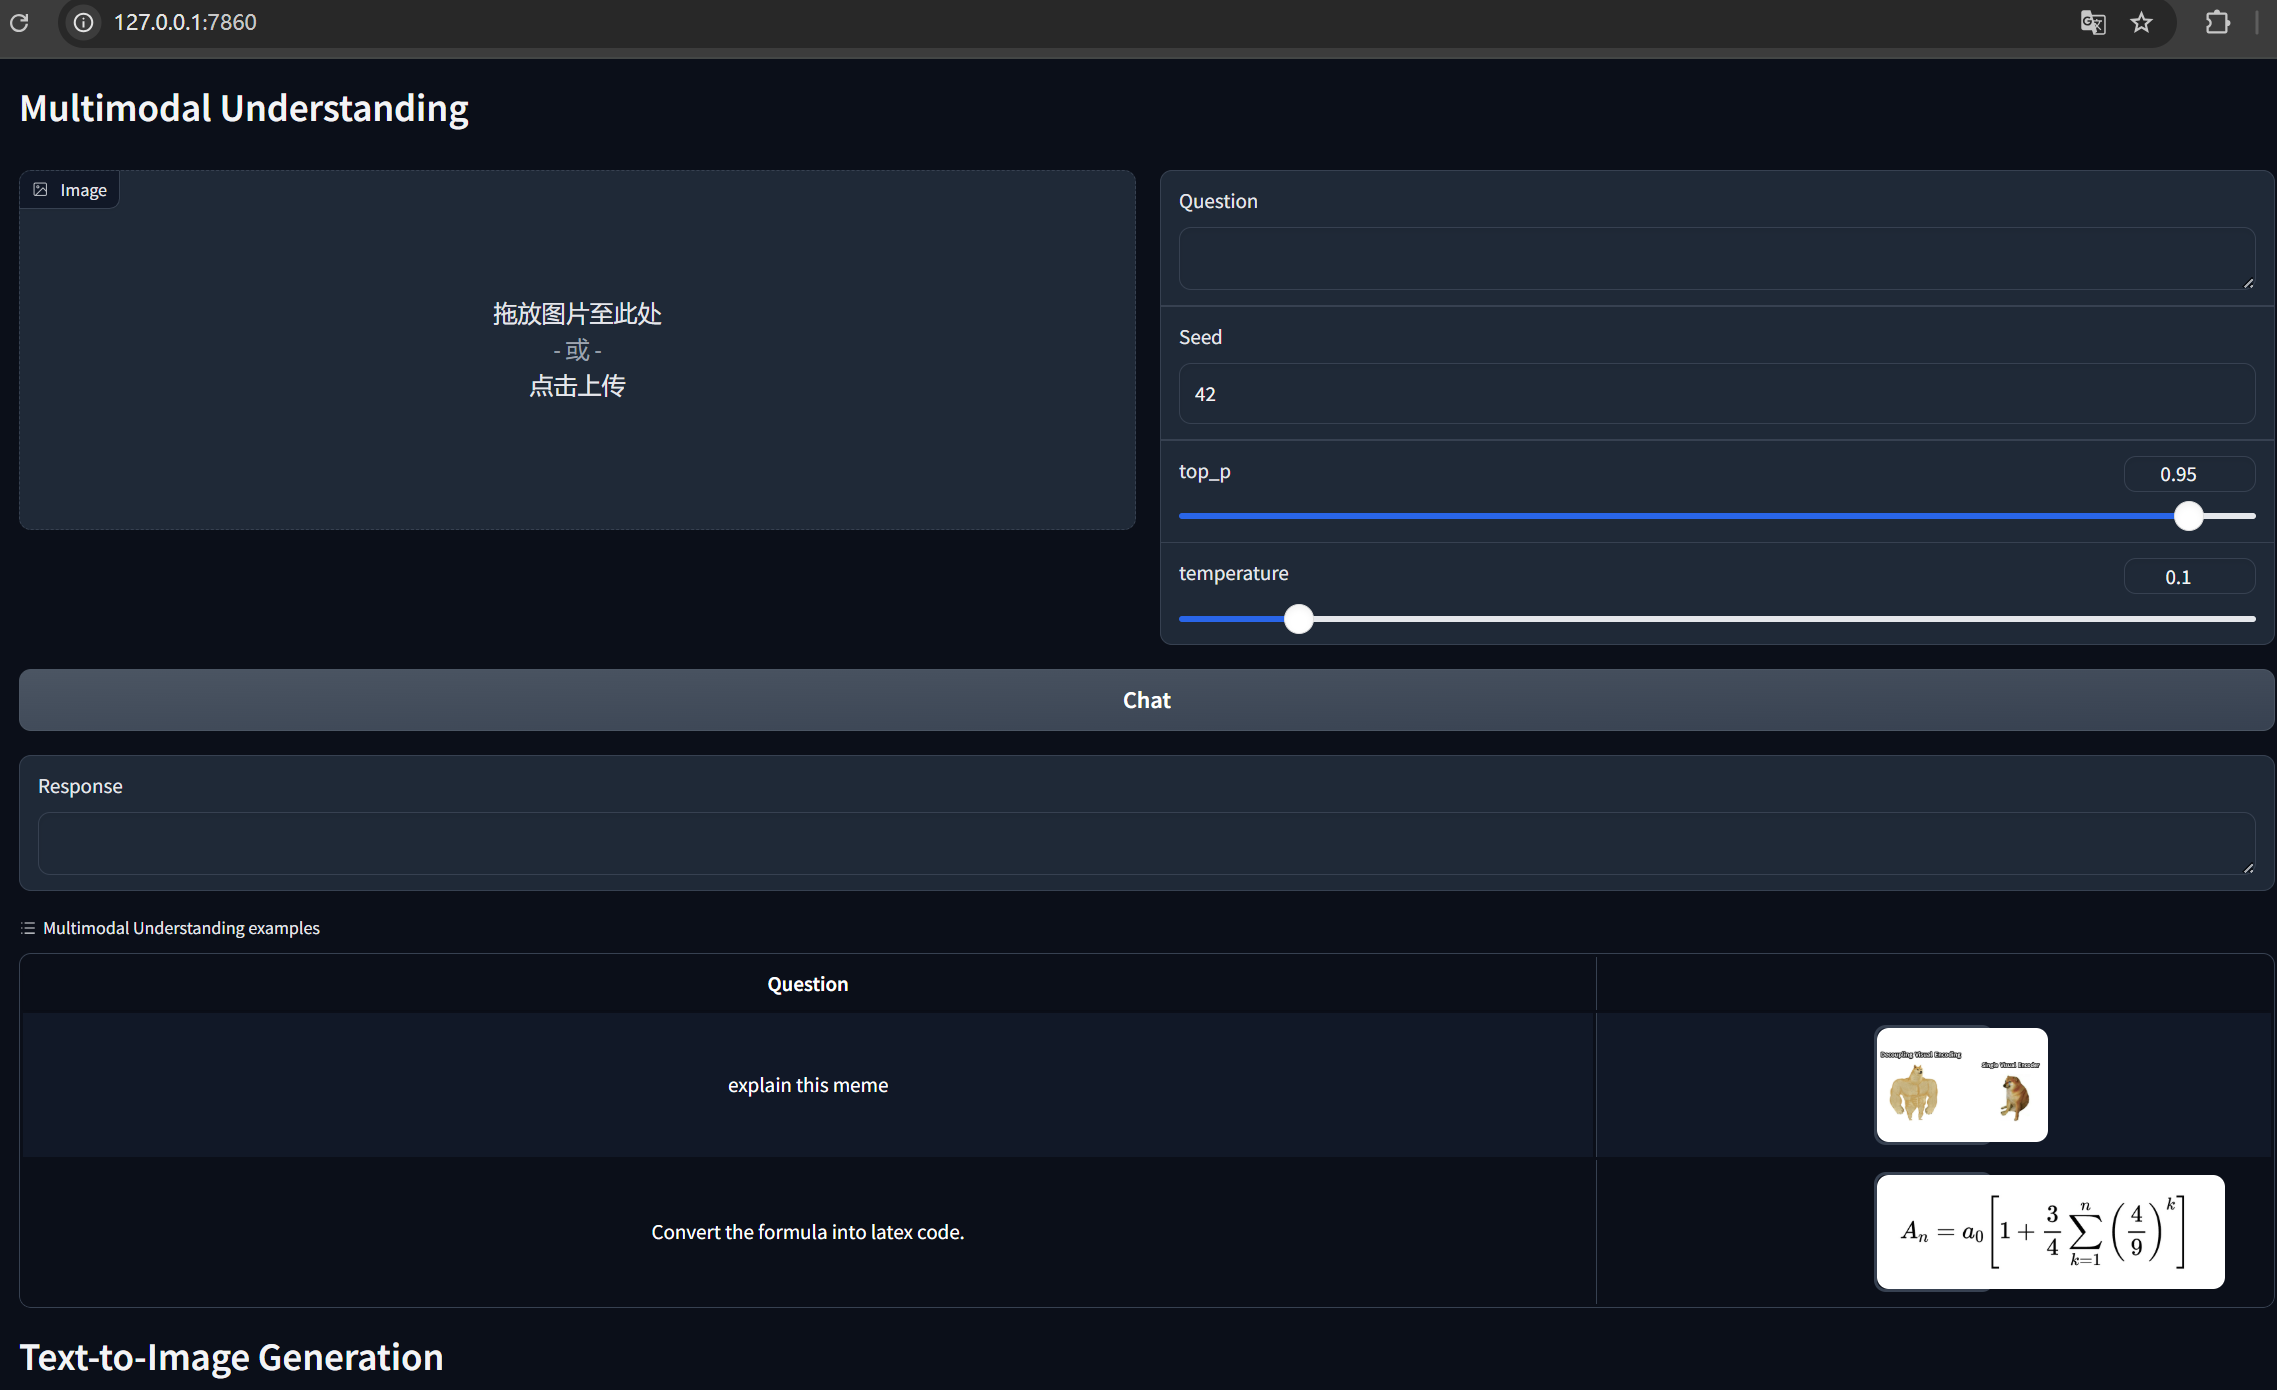
上传一张图片测试效果。
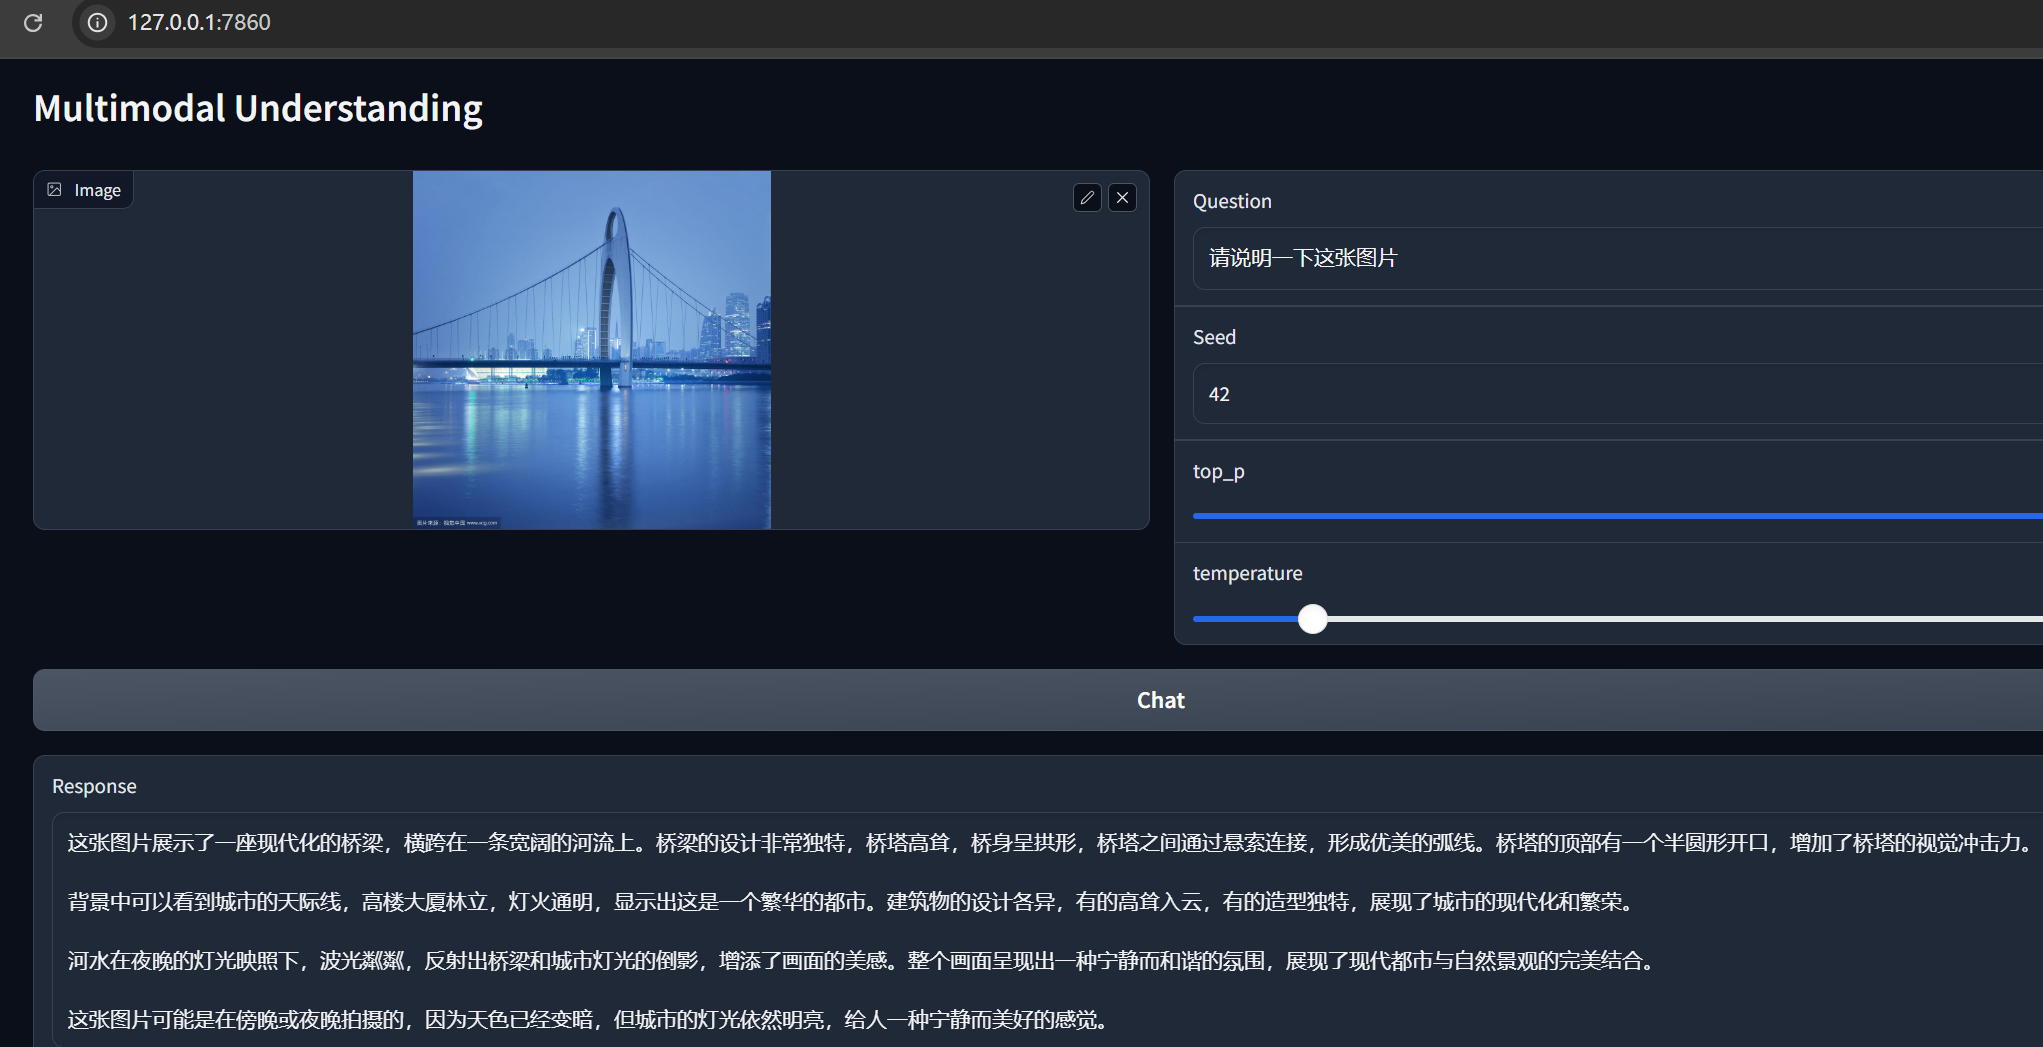
FastAPI演示
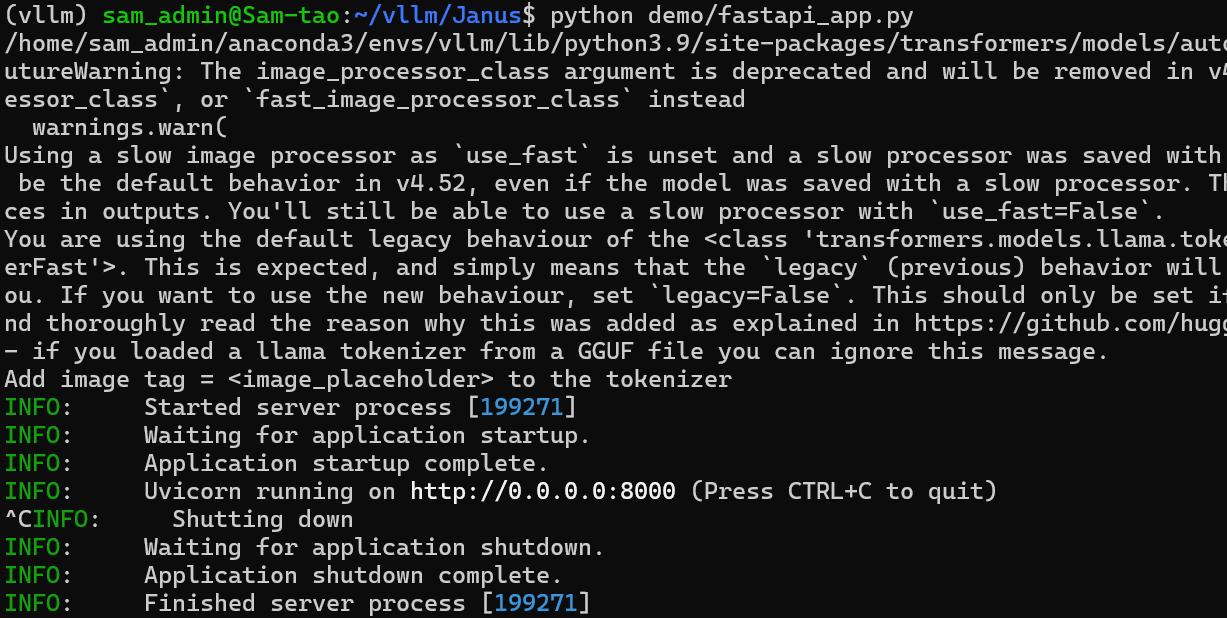
启动FastAPI服务器,请运行以下命令:
python demo/fastapi_app.py
调用API代码
import requests
from PIL import Image
import io

# Endpoint URLs
understand_image_url = "http://192.168.71.11:8000/understand_image_and_question/"
generate_images_url = "http://192.168.71.11:8000/generate_images/"

# Function to call the image understanding endpoint
def understand_image_and_question(image_path, question, seed=42, top_p=0.95, temperature=0.1):
    # 图片解析
    files = {'file': open(image_path, 'rb')}
    data = {
        'question': question,
        'seed': seed,
        'top_p': top_p,
        'temperature': temperature
    }
    response = requests.post(understand_image_url, files=files, data=data)
    response_data = response.json()
    print("图像理解:", response_data['response'])


# Function to call the text-to-image generation endpoint
def generate_images(prompt, seed=None, guidance=5.0):
    # 文本生成图片
    data = {
        'prompt': prompt,
        'seed': seed,
        'guidance': guidance
    }
    response = requests.post(generate_images_url, data=data, stream=True)

    if response.ok:
        img_idx = 1

        # We will create a new BytesIO for each image
        buffers = {}

        try:
            for chunk in response.iter_content(chunk_size=1024):
                if chunk:
                    # Use a boundary detection to determine new image start
                    if img_idx not in buffers:
                        buffers[img_idx] = io.BytesIO()

                    buffers[img_idx].write(chunk)

                    # Attempt to open the image
                    try:
                        buffer = buffers[img_idx]
                        buffer.seek(0)
                        image = Image.open(buffer)
                        img_path = f"generated_image_{img_idx}.png"
                        image.save(img_path)
                        print(f"Saved: {img_path}")

                        # Prepare the next image buffer
                        buffer.close()
                        img_idx += 1

                    except Exception as e:
                        # Continue loading data into the current buffer
                        continue

        except Exception as e:
            print("Error processing image:", e)
    else:
        print("Failed to generate images.")


# Example usage
if __name__ == "__main__":
    # Use your image file path here
    image_path = r"D:\bb.jpg"
    # Call the image understanding API
    understand_image_and_question(image_path, "描述这张图片")

    # Call the image generation API
    # generate_images("A beautiful sunset over a mountain range, digital art.")
bb.jpg图片

运行上面代码结果为:
图像理解: 这张图片展示了一个未来主义的科幻场景。画面中心是一个巨大的立方体,立方体内部有明亮的蓝色光芒,似乎是某种高科技装置或能量源。立方体被放置在一个高耸的基座上,基座由多个阶梯状结构组成,每一层都有类似电路板的图案,散发着蓝色光芒。
背景是一个广阔的星球或城市景观,天空中呈现出美丽的日落或日出景象,天空的颜色由橙色和紫色渐变,远处可以看到山脉和一些建筑物。整个场景充满了未来科技的元素,给人一种高科技、未来感十足的感觉。
图片中的光线和色彩运用得非常出色,营造出一种神秘而高科技的氛围。
上一篇: Dify+Ollama+deepseek部署本地大模型
下一篇: WSL从C盘迁移到D盘
- openvpn linux客户端使用
51880
- H3C基本命令大全
51620
- openvpn windows客户端使用
41972
- H3C IRF原理及 配置
38794
- Python exit()函数
33278
- openvpn mac客户端使用
30256
- python全系列官方中文文档
28903
- python 获取网卡实时流量
23914
- 1.常用turtle功能函数
23833
- python 获取Linux和Windows硬件信息
22194
- Ubuntu本地部署dots.ocr
299°
- Python搭建一个RAG系统(分片/检索/召回/重排序/生成)
2500°
- Browser-use:智能浏览器自动化(Web-Agent)
3170°
- 使用 LangChain 实现本地 Agent
2634°
- 使用 LangChain 构建本地 RAG 应用
2614°
- 使用LLaMA-Factory微调大模型的function calling能力
3333°
- 复现一个简单Agent系统
2593°
- LLaMA Factory-Lora微调实现声控语音多轮问答对话-1
3424°
- LLaMA Factory微调后的模型合并导出和部署-4
5630°
- LLaMA Factory微调模型的各种参数怎么设置-3
5435°
- 姓名:Run
- 职业:谜
- 邮箱:383697894@qq.com
- 定位:上海 · 松江
